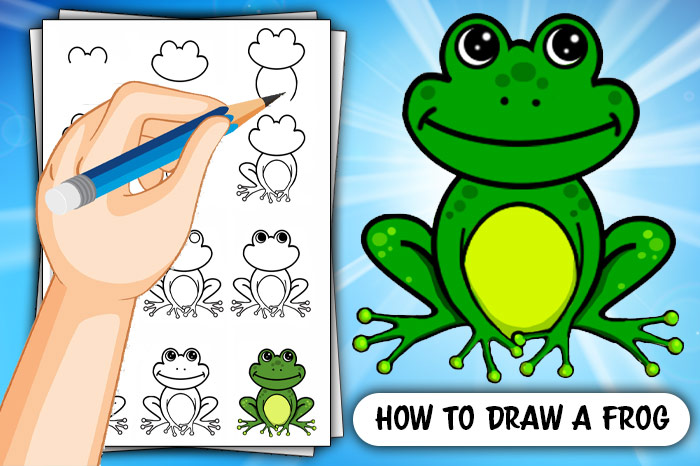
Everybody loves frogs! Unless you have ranidaphobia if so, look away now. They have been roaming the Earth for more than 200 million years, that’s longer than dinosaurs were around! It must be about time to learn how to draw one. We make it easy with our ‘How to Draw a Frog Step by Step Guide’ pictures and instructions. You will have a cute and springy companion in no time!
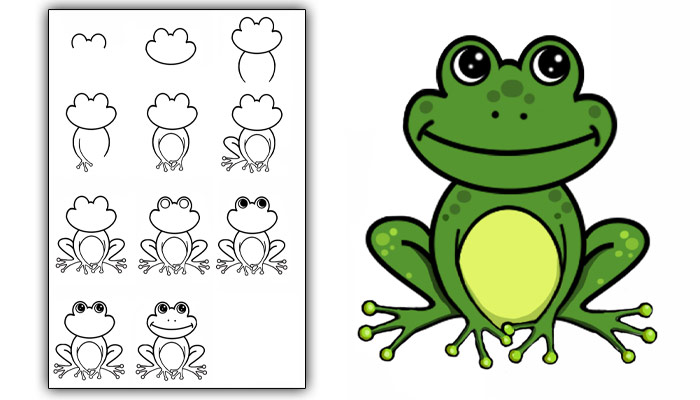
Simply grab a pen and paper, or tablet and stylus and follow the instructions below.
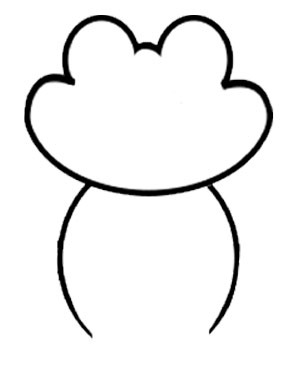
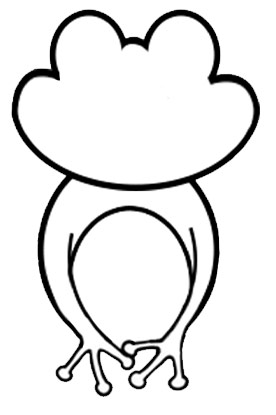
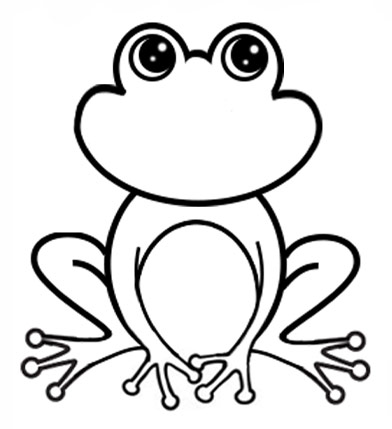
Step 1 – Top of the Head
In the top half of your paper draw two, large, downward-facing C shapes with a small gap between them. These are where your frog’s eyes will be. Complete the top of its head by joining the C shapes with a small curve.

Did you know? Frogs use their eyes to eat! They blink and pull their eyes down into the roof of their mouth when eating. Essentially using their eyes to push their food down their throats.
Step 2 – Finish the Head
Draw two more C shapes, the same size as before. One under each of your first C shapes, facing slightly inwards. Join the bottom of your new Cs with a long, curved line.

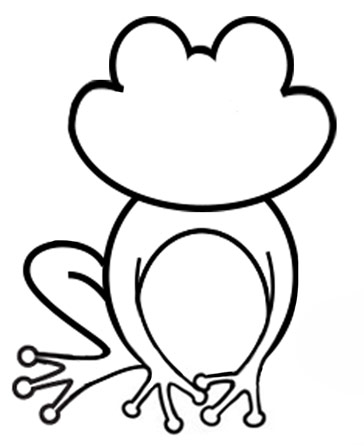
Step 3 –Sides of the Body
Draw two curved lines, one for each side of the frog’s body. They should start from the bottom of your frog’s head. Use your first Cs as a guide, your curves should start roughly in the middle of each and curve outwards to just slightly wider. They should be about the same height as your frog’s head.
Step 4 – Left Arm
Draw another curve, running parallel, inside the left-hand body curve. Start roughly a third of the way down and continue slightly longer than the first. Add 3 froggy fingers. These are long with circles for the tips. Join your last finger to the body curve.

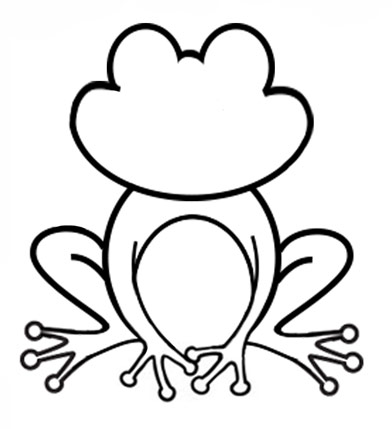
Step 5 – Right Arm and Tummy
Repeat step 4 for the right-hand side, to create its other arm. Outline the tummy by drawing another downward-facing C shape between the arms.
Did you know? Frogs don’t drink water, they absorb it! They have a ‘drinking patch’ on the underside of their bellies which can absorb water and keep them hydrated.
Step 6 – Left Leg
Add a leg on the left by drawing a large S shape. Your S should start in line with your frog’s armpit and end just above the level of its hands. Add the crease in his leg with a single line coming out from the body. Draw his foot, with three long toes and circular tips. The middle toe should come out slightly further than the knees. Connect the last toe to your frog’s wrist with a long, smooth line.
Step 7 – Right Leg
Repeat step 6 for the right-hand side to create your frog’s right leg. The body is now complete!
Did you know? The South African sharp-nosed frog used its impressive legs to break the world record for the longest jump? Making it, an impressive, 44 times its body length!
Step 8 – Outline the Eyes
Back to the face. Add two circles, one in each of your first C shapes. These will be the eyes.

Step 9 – Shade the Eyes
Colour most of each circle black, leaving 2 crescent shapes in the bottom left. If you are using pens or paint look ahead to step 10 as you may need to leave some more areas blank.
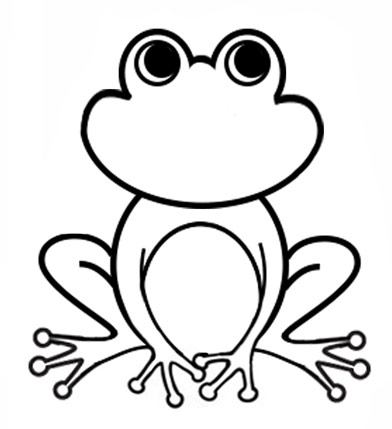
Step 10 – Highlight the Eyes
Add two white dots to each eye. A small one just below the centre and a larger dot in the top right.
Step 11 – Nose and Mouth
Finish the face. Add two dots in the centre of his face, leaving a gap between them. These are your frog’s nostrils. Draw its mouth with a long curved line running across the widest part of the face. Add a small, curved, vertical line at each end to give your frog a cheeky grin.
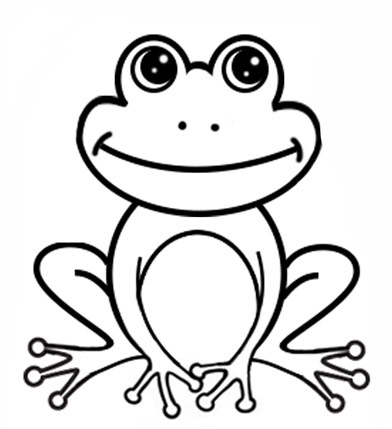
Did you know? Frogs actually have teeth! Just on their upper jaw, to hold on to their prey.
Step 12 – Colour and Shading
Colour your creation! Here is where you can unleash your creativity. You may wish to work in shades of green with a lighter shade for its belly, fingers and toes. Perhaps you want your frog to dazzle in purple, orange or a rainbow of colours? Spots can be added in both lighter and darker shades to create texture. Make it stand out with a bit of shading under its belly and in the creases of its legs.
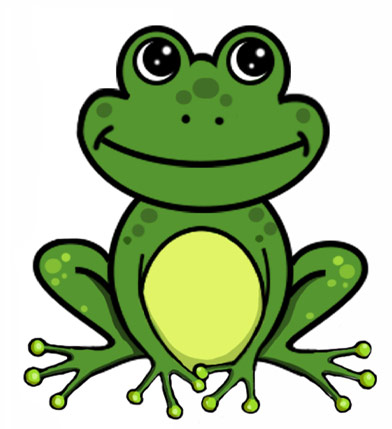
Congratulations! You have completed an adorable amphibian.
Now we’ve shown you the ropes why not keep practicing? You could have an army (the collective term for a group of frogs) in no time!
There are over 7000 different species of frog so don’t keep them all the same.
How about adding some warts and scaly skin to make your frog a toad? All toads are frogs, they’re just a sub-classification that has not had as much success with their skincare regime. They also have shorter hind legs. Toads really have none of the luck!
Don’t stick to the same size. The world’s largest frog, the Goliath Frog, can reach a foot long and can weigh a hefty 7lbs! By contrast, the world’s smallest frogs could sit comfortably on your fingernail. The Paedophryne amanuensis is the smallest at 7.7 millimetres. It just beats the, adorably and more catchily named, Mini mum sitting at 8 to 11 mm long.
Maybe you could experiment with different colours? Bright red for a chubby tomato frog? Yellow and black patterns for the bumblebee poison frog? How about a spectacular blue poison dart frog? A beautiful sapphire colour with ominous black spots. Maybe a golden poison frog? A vibrant yellow cutie with enough toxin in its system to kill up to 9 people! Okay, maybe we are starting to understand ranidaphobia a little more…

If you have liked this post, you might also love our free grid drawing worksheets.